Artist Comments-
Here is my lesson on How to draw goten from side look.I felt that
it will save my time if I will draw this on a Drawing book,but next time I will publish my lesson on the previous style I used to .so stay tuned.
Details
Uploaded:April 8, 2016
Artist:

Difficulty:Intermediate
Steps:6,5,4
Updated:April 8, 2016
P.O.V:Front,3/4,side profile
Favourited:42 times
Draw Goten Front
Step 1.
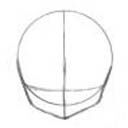
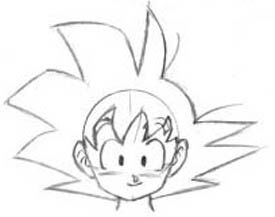
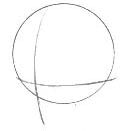
To make a good proportional image, you first need to start with a basic plan. Make sure youuse a pencil that can easily be erased when doing this, and don’t press too hard.When drawing a face front on, first draw a circle (you can use a compass or stencil if youreally want). The first line represents the center of the face (so when doing three quarter views you can bend it appropriately. I’ll go through that later). It’s very importantto make sure your image is symmetrical.Next, draw the eye line. This should be between half way and a third of the way up the face. Make sure it’s horizontal (otherwise the eyes will end up wonky). You can then draw in the shape of the chin. Goten’s still a kid, so his face is still rounded.
step 2.
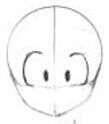
From here you can draw the eyes. Use the centre line to make sure the pupils are the same distance from the centre line. Next draw the outline of the eyes. If you have trouble getting them to look the same, then try putting another horizontal line to mark the top of the eyes. Remember to draw the bottom line as well as the arches.
step 3.
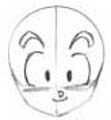
Then go on to the nose. In Goten’s case just draw a small rounded triangle on its side. The eyebrows are pretty straight forward, in this case just draw to arches that come to a point.If you have trouble with the mouth, then just draw it closed for now. I’ll go over emotions later on. Remember to draw the lines under the eyes.
step 4.
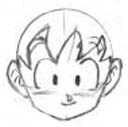
Go over the chin again and check to make sure it looks right with the rest of the face. Then draw in the outline of the ears (once again, draw them at the same height and size). They shouldn’t reach higher than the top of the eyes do. Then draw Goten’s fringe.Usually he has one main spike to the left of the centre, and more spikes around the sides. In most pictures he has four or five spikes in his fringe.
step 5.
Draw in the detail in the ears (this doesn’t have to be too detailed if you don’t want). Then start the hair. This is pretty difficult and can wreck the picture if it’s done badly. Start from below the ears and leave some distance between your first circle and the hair (hair has thickness). Goten has three spikes on the right side (his left), and four onthe left (this switches when he turns his head). The best way to learn how do draw Goten’s hair is probably to work from anotherpicture. It takes a while to get the hang of.
step 6.
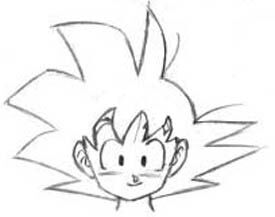
Erase all the lines from your planning. If you’re worried about losing part of the picture, you can ink it as I do, and erase the old lines afterwards (of course, you’ve got to be careful, or you’ll just muck up the picture).And then you’re finished the face. If you hadtrouble getting the face symmetrical, then maybe you should move on to the quarter views. In my opinion, they’re a lot easier…
Draw Goten From 3/4 Angle
step 1.
The plan for a three quarter view face uses the same method of showing where the centre line of the face is, and the eye line. First draw the circle, then the centre line of the face (you’ll see that moving the line futher to the side will make the character be facing more in that direction.) Next, draw theeyeline (note that the line will have to be rounded and on a slight angle).
step 2.
Using the plan to determine where the chin and cheek bone will be, draw in the shape of the face. The ear’s middle should be at the eyeline.
step 3.
Draw the face using the method from the first lesson, but remember to make the features on the side furthest away narrower.Notice that in my demonstration the eye on the right side of the face is about twice as far away from the centre line than the left side is, and that the centre line marks about the one third mark on the face. So if the line was one quarter of the way across the face, the right eye would be three times the distance from the centre line as the left. (I hope some of you out there understood that…) The nose also curves towards the left side of the pic.
step 4.
The fringe when viewed from an angle tends to towards the side furthest away. Draw the furthest spike sticking out a little from the forehead. Goten’s hair becomes more bunched up at the end furthest away, and appears to be shorter, while the closest side looks longer than when viewed straight on.
Final (step 5.)
Then erase the plan and you’re done!keep on mind that you have to ink the Borders of your drawing or if you erased it,Bychance you will erase the necessary drawing.
Draw Goten From Profile.
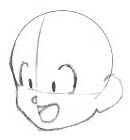
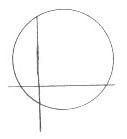
step 1.
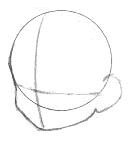
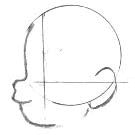
Side views tend not to work the same way as front and three quarter views, as shape of the nose and chin have to be shown in more detail. I found that the method generally used for the other two views doesn’t generally work for sideviews, and that there doesn’t seem to be any other widely used methods, so I designed my own way. . The circle and horizontal lines still represent the head and eye line. The vertical line marks the back of the eye and the chin.
step 2.
Using the circle as a guideline for the forehead, and the vertical line to determine the chin, draw in the face. The nose is usually centred on the eyeline (make the nose rounded). The top lip usually juts out further than the nose. There’s a lot of little features like the shape of the nose and the way the chin curves that simply have to be learned by looking at examples and practicing.
step 3.
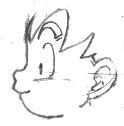
Draw the ear centered on the eyeline, and far enough in so that it doesn’t go over the boundary of the circle. (You might want to try looking at references for the detail) Draw the bottom of the chin. Sometimes the chin goes all the way up to reach the ear, depending on the angle (or perhaps how the artist feels at the time…). Remember to makethe chin rounded and not too deep, otherwise Goten will look too grown up.Draw in the eye. As this is a side view, the eye should be narrower than it would look front on. Next, the fringe. Goten spikes tend to point more towards the
Front when view from the side. He has one spike towards the front that sometimes sticks out over his forehead.
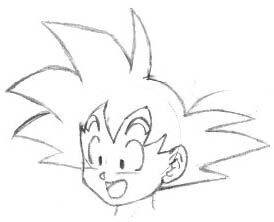
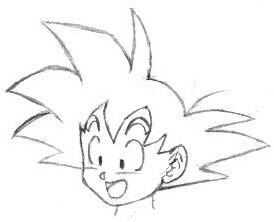
step 4.
Goten’s hair still has the distinctive shape even when side on (which is probably against several laws of physics, but hey, this is anime). The hair on the side which is furthest away in the picture is bunched up, and the spikes sit a little higher up on Goten’s head. The finished fanart is below. Side views are by far the hardest position to draw the head in, so don’t stress too much if you have trouble with them.
